In 2023, I got into high-speed printing with the Creality K1 printer. Due to the somewhat disappointing quality of the K1, I conducted various experiments to improve it, achieving several results and sharing them multiple times through my blog and YouTube channel.
Based on a few results obtained, I also learned that setting the speed to 150mm/s or higher evenly in the default Creality slicer allows for creating quite high-quality prints.
However, among K1 users, some advanced users have recommended using an open-source-based slicer called Orca Slicer from the very beginning.
Orca Slicer appeared quite similar to Bambu Lab's slicer, which is well-regarded for both its appearance and functionality. However, I initially tested printing with Orca Slicer but didn't feel any significant improvement in quality on the K1 printer, so I hadn't been using it.
Recently, after acquiring the Bambu Lab A1 Mini printer and printing the included mouse kit, I was so impressed with the results that I decided to test the same data on the K1.
Please refer to the video below for the overall test results.
First, this is when printing with Hyper PLA using the K1's default normal settings. The left side is the result printed on the A1 mini, and the right side is the result printed on the K1.
The left snake skin data was made using Sunlu PLA-CF filament. While there is a difference in the filament itself, the quality difference is quite visible to the naked eye.
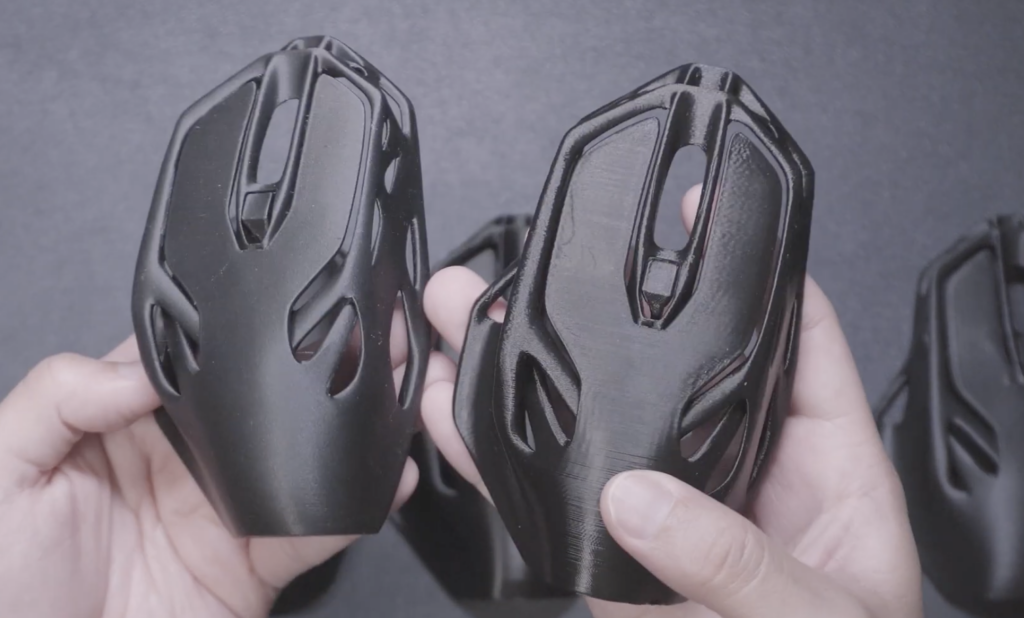
Looking at the internal results, the internal view clearly shows the K1's chronic ringing issue, and the overall surface quality looks disappointing.
So, why does this happen? To verify this issue, I tested using the Creality Slicer with default normal settings, my custom Pure profile, and the Orca Slicer, which is said to have good quality.
Below are the Orca Slicer, Creality Slicer Pure Profile, and Creality Slicer Normal from left to right. The Orca Slicer appears to have significantly better quality.

The left side shows the data printed on the Bambu Lab A1 Mini, and the right side shows the result printed with Orca Slicer. Although the Orca Slicer result looks somewhat lacking, it still looks quite excellent.
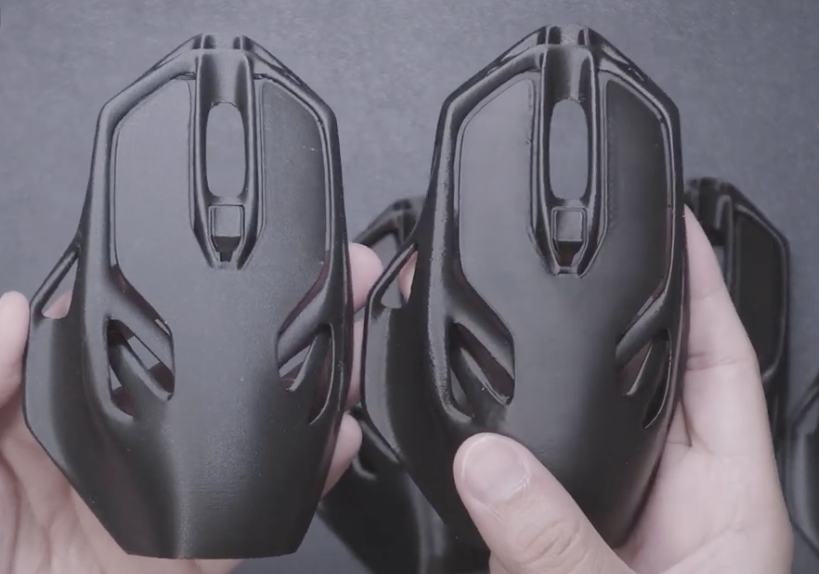
Upon closer inspection, the Orca Slicer results actually look better in some parts. However, the ringing issue is still present.

Why is there such a difference in results?
First, while there may be several issues with the hardware itself, the quality was improved when generating G-code with Orca Slicer on the K1 printer, so it can be inferred that the problem lies with the G-code generation method of the slicer itself.
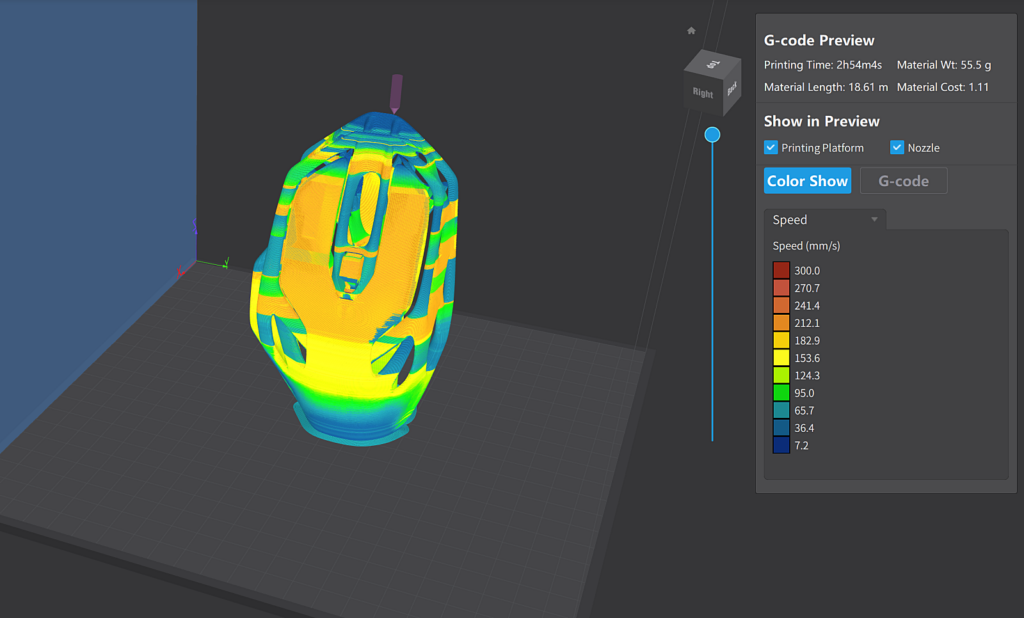
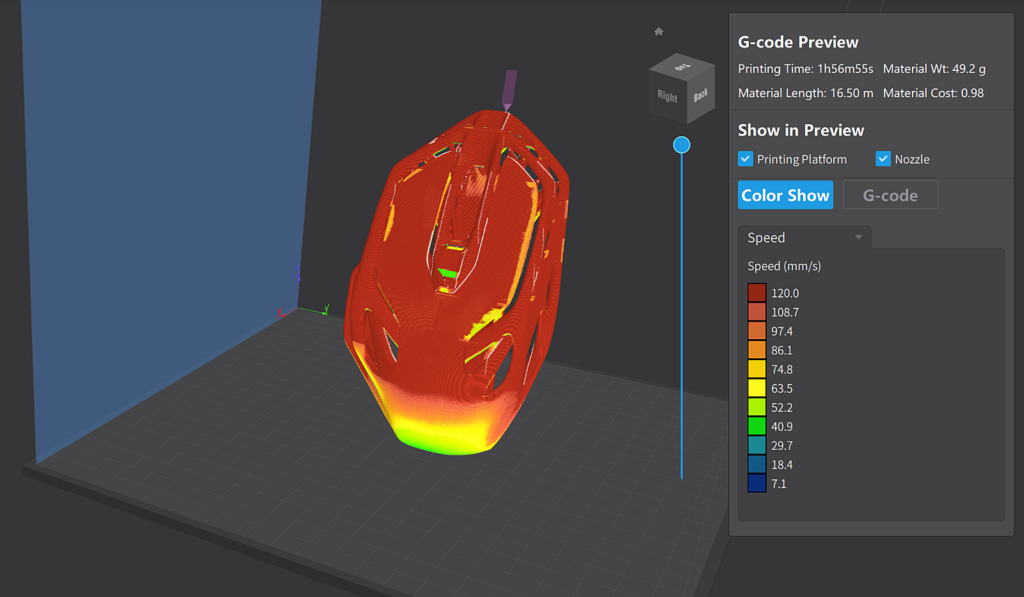
First, when slicing with the Creality Slicer using this data, the result is as follows.
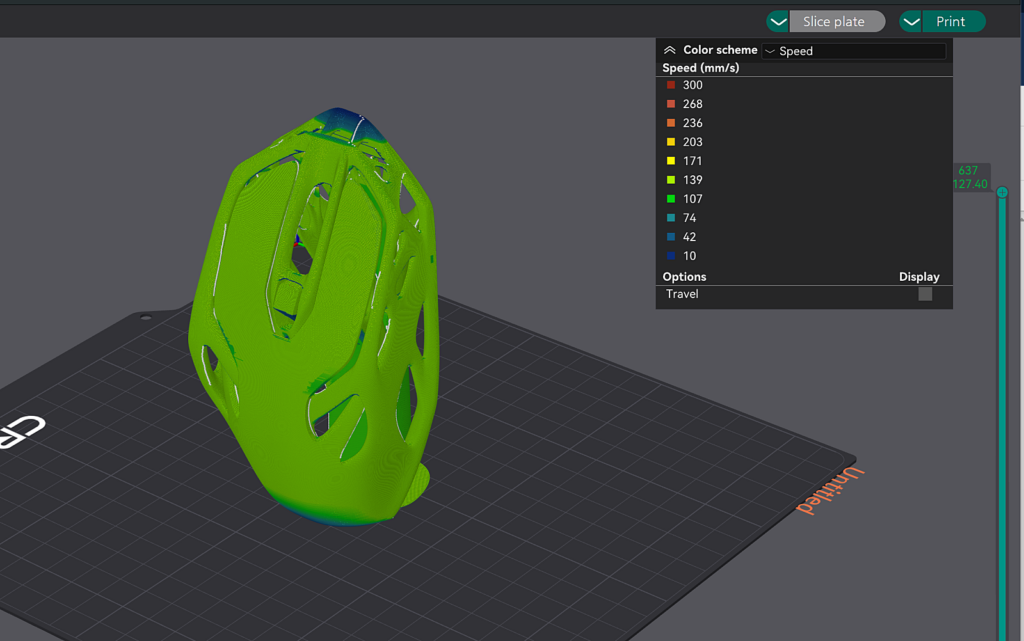
As you can see, depending on the size and shape of the geometry, you can observe speed control. The deviation is quite large; even for the same Z-axis layer, the speed difference reaches nearly 10 times, ranging from a minimum of 30 to a maximum of about 212.
Conversely, slicing the same data in Orca Slicer results in the following.
In areas with large overhangs and small parts, it controls speed, but it appears to maintain speed relatively evenly in areas where the overhang angle does not change significantly.
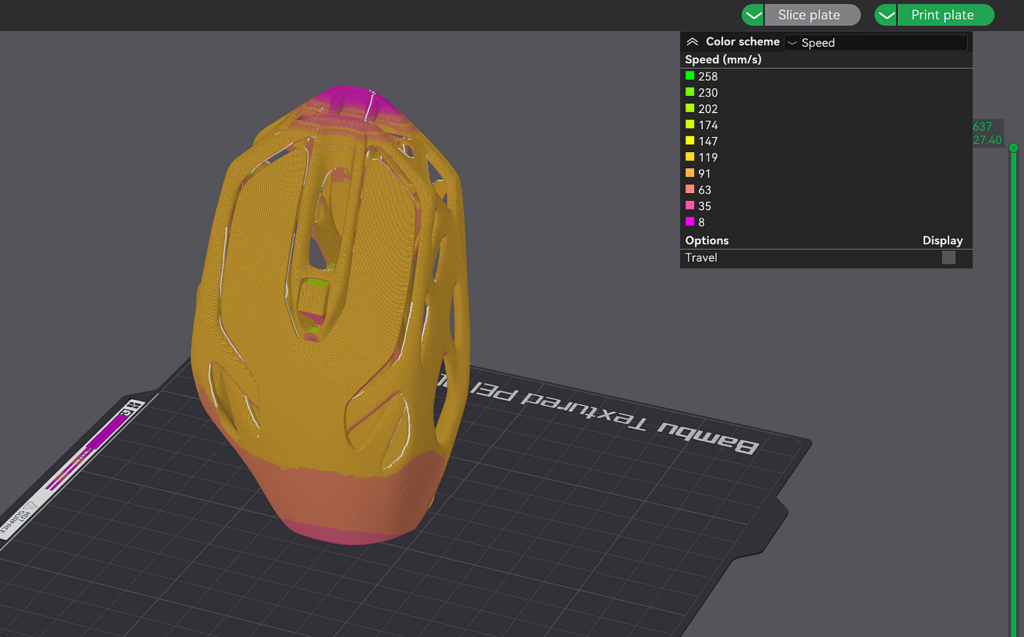
Also, when slicing for the K1 in Orca Slicer, the same values can be confirmed.
Therefore, it can be inferred that this method of creating slicing values ultimately has a significant impact on the results of the printed object.
These differences in slicing values are similar to the approach I previously took when sharing the Sunsun profile. The core of the Sunsun profile was also to keep the Z-axis speed changes as even as possible, and by setting the minimum speed to 150mm/s or higher, it reduced the ringing problem.
However, even when applying such values for slicing, it appears that the speed decreases at the end of the part's area, which ultimately affects the print quality. While I am not sure exactly how the Creality Slicer creates its internal gCode data, it seems there is a significant difference in the algorithms themselves.
Of course, just as I have experimented in the past, it is also a method to adjust the Creality Slicer values strictly to produce prints similar to Bambu Lab or Orca Slicer. However, unlike the past, since Orca Slicer now supports the K1 and a profile exists, it seems better to simply use Orca Slicer for convenience now.
Of course, even with the K1 as a baseline, using the Creality Slicer still saves a lot of time. Therefore, for simple shapes like the mouse data above, which are not complex and have an even distribution of surfaces overall, it seems fine to use the Pure Profile I have distributed with the Creality Slicer.
Since I've been using the excellent reference printer Bambu Lab, it's almost paradoxically possible to elevate the quality of the K1 printer as well.
Sunlu PLA-CF : https://s.click.aliexpress.com/e/_DEhfsTl
Creality K1 : https://s.click.aliexpress.com/e/_DBQg6kf
Creality Hyper PLA : https://s.click.aliexpress.com/e/_Dl3x0hZ