Today, I will introduce how to use the Canvas feature provided by Google Gemini AI, which I have been using recently, to prototype game development.
Original development includes a concept called "Paper Prototyping".
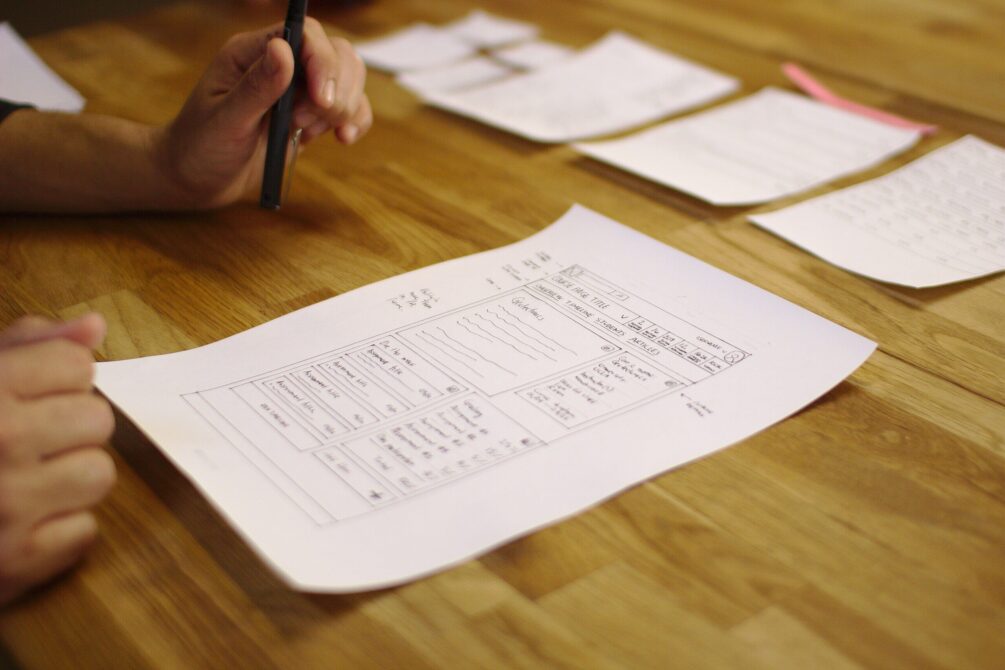
< Image Source : Wikipedia >
The Wikipedia definition of a paper prototype is as follows.
Paper prototyping is a widely used method in human-computer interaction design processes that helps developers create software that meets user expectations and requirements. In this case, it is particularly useful for designing and testing user interfaces. It involves creating a rough, hand-drawn sketch of the interface to be used as a prototype or model of the design. Paper prototyping may seem simple, but this usability testing method can provide useful feedback that helps design products that are easy to use. Many usability experts support this.
Source: https://en.wikipedia.org/wiki/Paper_prototyping
In other words, simulating functionality with paper or simple tools and testing usability by interacting with users before creating a product is an excellent method. This is a method I have used since I started game development. I would create simple card or board games with paper and drawings to implement a prototype of the desired game, and then check the fun that occurs during the interaction with actual users beforehand.
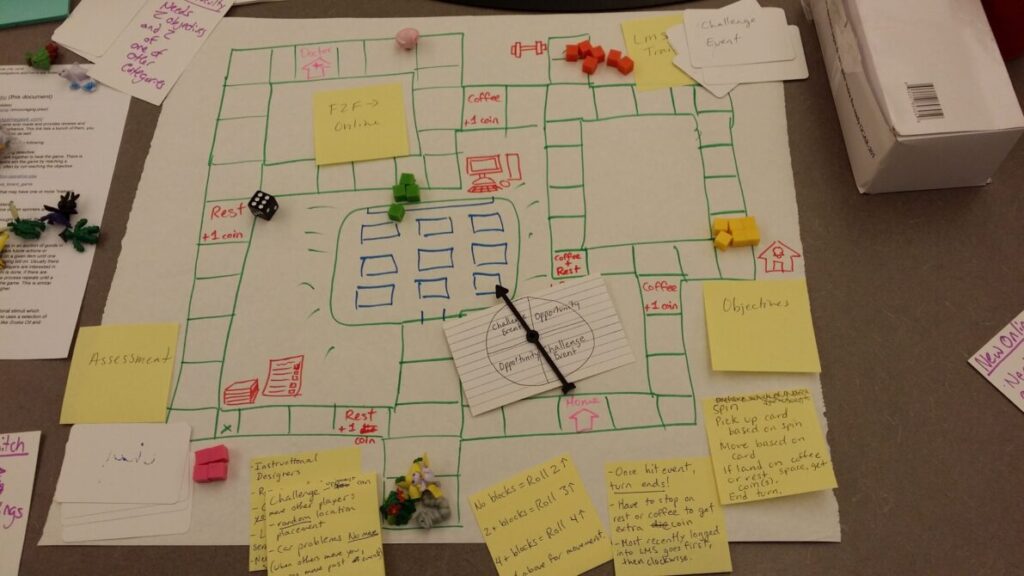
<Paper prototyping is one of the essential early-stage game verification methods widely used in game development, image source: ismaellara.com >
However, with interactive AI services developing so rapidly recently, and features emerging that allow you to talk through your ideas, refine them, and immediately code and launch them on the web with AI assistance, it has become possible to quickly and easily create prototypes without necessarily needing paper and writing tools.
Among them, with the addition of the Canvas feature at the beginning of the year, a feature was introduced that allows for easily launching HTML-based web pages, which is widely used in prototyping.
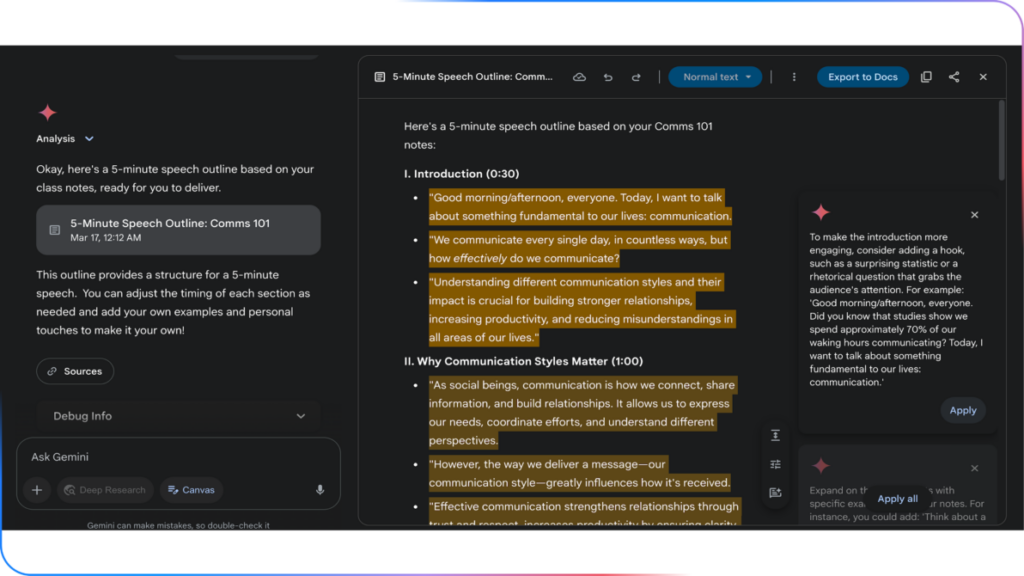
< The innovative Google Gemini Canvas, which enables prototype-based interaction, source: Google >
Especially since a new intern joined our development team, we are conducting various test scenarios, and by utilizing this Canvas feature, we are creating various prototypes. Therefore, we are actively using the AI paper prototyping technique; I will also try to use it when teaching at school and summarize it with simple content.
This feature is available starting with a Google Gemini Pro subscription, but it appears that new accounts can use pro features like Canvas initially.
By conversing with the LLM, the planning content is organized, and when requests are made such as clicking the Canvas button at the bottom to create a webpage, implement it, etc., it immediately starts coding and produces a webpage in a form where testing is possible right away.

So, I tried asking a question to create a Go-moku game.
Of course, since Go-moku is a widely known rule, it is possible to summarize the rules and concepts for creating the game without any special difficulty, allowing the LLM to understand the rules and build the game without major errors.

So now, let's request the creation of Go-moku based on the rules we've just organized.
If you'd like to try it yourself, please follow the prompt below exactly.
✅ Step 1: Create the Go-moku board
From now on, I will create a simple Go-moku game. First, use HTML, CSS, and JavaScript so it can run in a web browser.
Draw a Go-moku board with 15 rows and 15 columns. The squares should be square, and apply styles so the grid lines are clearly visible.
Position the game board in the center of the webpage.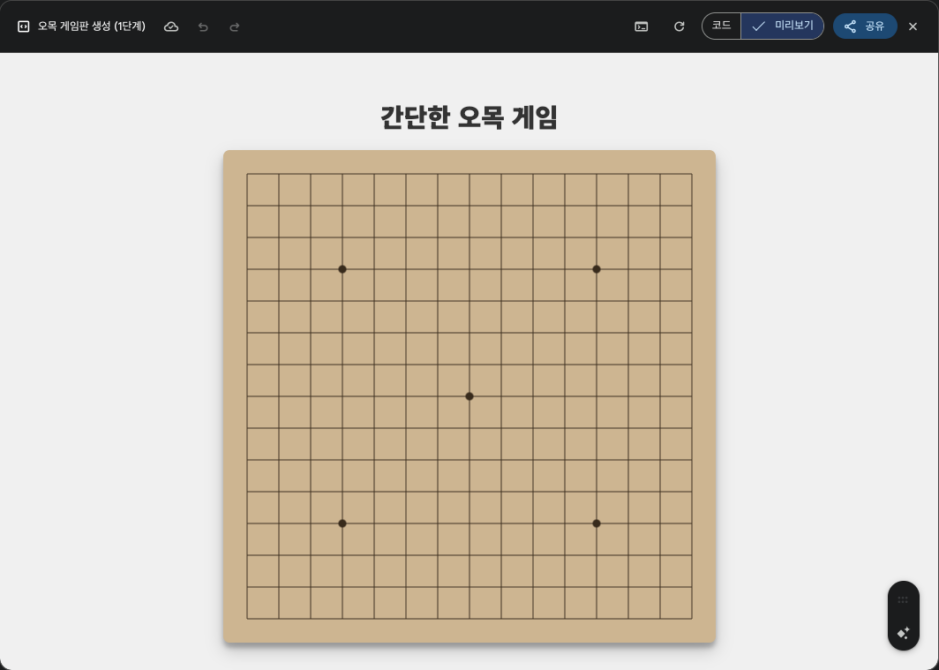
Created the Go-moku board right away. Let's move on to the next step.
✅ Step 2: Add functionality for placing stones Okay, now add the functionality for the user to place stones on the Go-moku board. When the user clicks on an intersection of the board, place a black stone at that location. The stone should be round and positioned exactly in the center of the intersection. Prevent placing a stone on a spot where a stone has already been placed. For user-friendliness, show a square pointer at the location where the stone will be placed.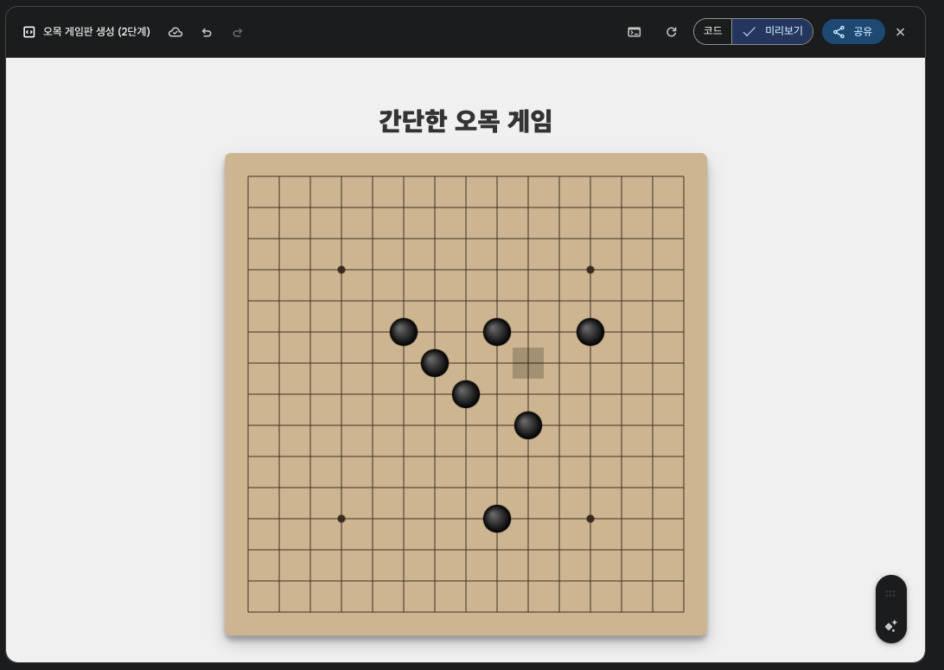
Now, as requested, the work has been done correctly.
Let's move on to the next step.
✅ Step 3: Adding Basic AI Turns (Random) Now, let's create the AI's (computer) turn. When the user places a black stone, it's the AI's turn next. The AI will use a white stone. Let the AI randomly select an empty spot from the squares where no stone has been placed yet and place a white stone. Create the game flow so that the user and AI take turns placing stones.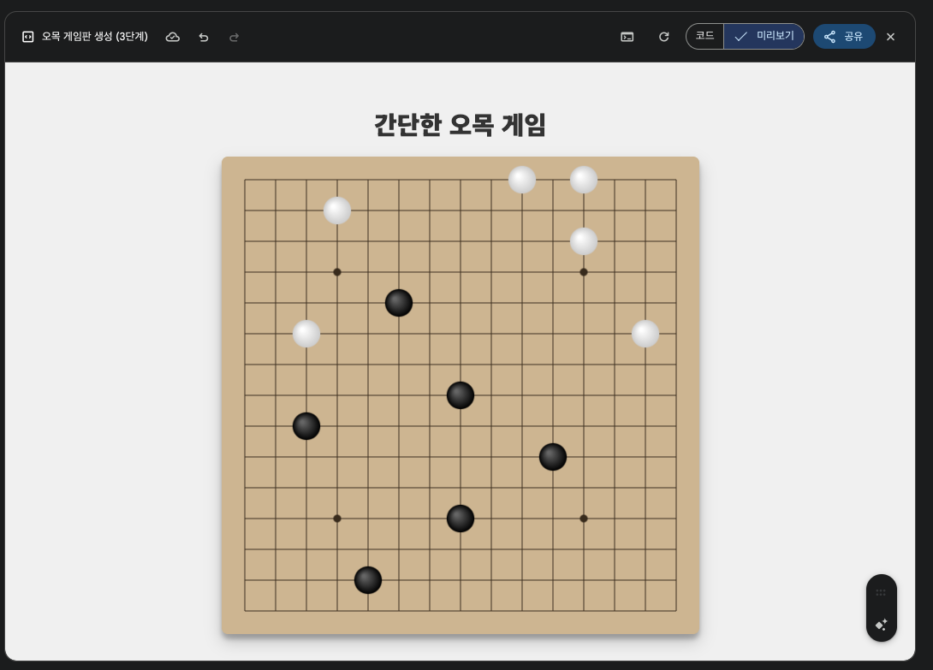
Finally, the AI is starting to place white stones. However, since it's just placing them randomly right now, the game isn't progressing.
Let's move on to the next step.
✅ Step 4: Adding Win Condition Verification It's time to add the most important win rule. Every time a stone is placed, check all directions (horizontal, vertical, diagonal /) based on the stone just placed. If stones of the same color are placed consecutively 5 times, let the game know it has ended. For example, display a large message on the screen such as 'Black Wins!' or 'White Wins!' and stop the game so no more stones can be placed.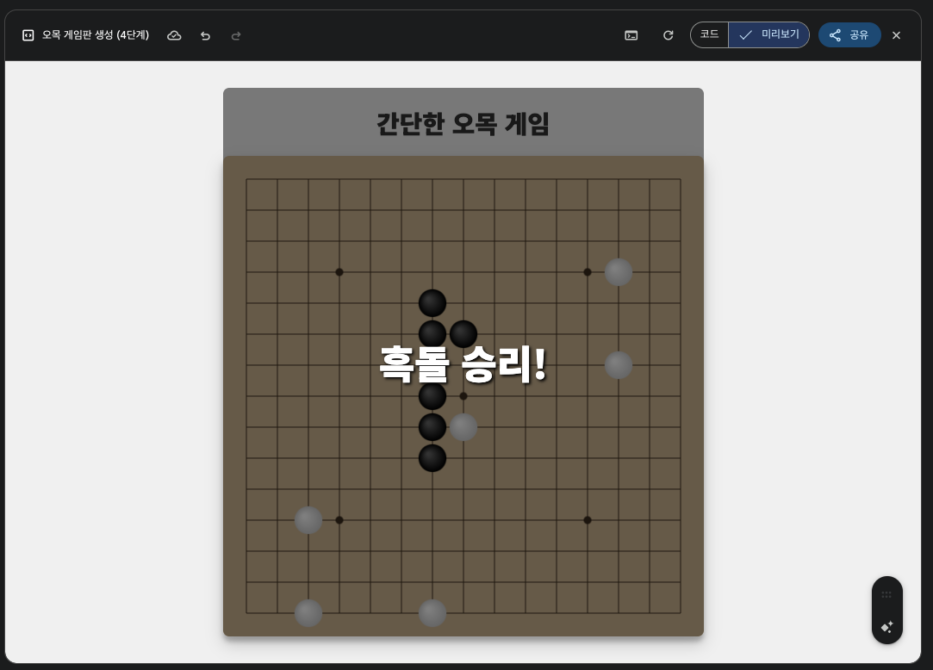
The victory condition, which can be said to be the most important in the game, has been properly implemented.
Next, let's move on. Now it's finally time to give the AI some intelligence.
✅ Step 5: AI Upgrade (Adding Attack and Defense Logic) Let's make the AI smarter. Modify the current random logic according to the following rules. The priority of the rules for determining where the AI places a stone is as follows. (Winning Attack) If there is a spot where the AI (White stone) can win immediately with this move (completing 5), place it there. (Mandatory Defense) If there is a spot where the opponent (Black stone) can win with the next move (completing 5), block that spot. (Favorable Attack) If there is a spot where the AI can create an open 4, place it there. (Favorable Defense) If there is a spot where the opponent can create an open 4, block that spot. If none of the above situations apply, place a stone in a random empty spot as before.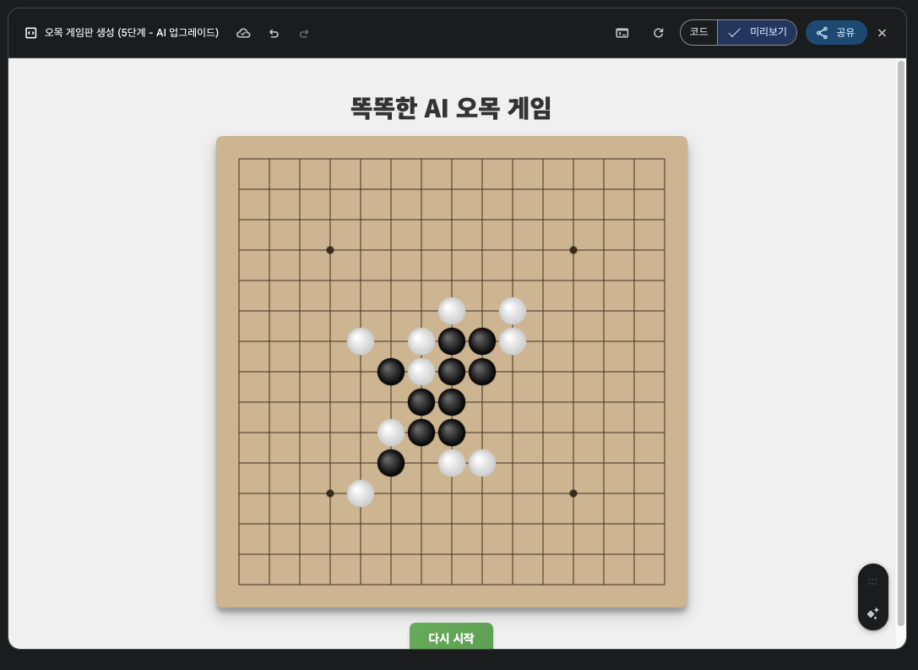
Finally, I'm starting to play Go-moku quite well!!
At first, I thought I would lose immediately, so I tested it while being extremely nervous.. After finally managing to win, I noticed the patterns seemed a bit simple.
So, let's try boosting the intelligence a bit.
✅ 6단계: 추가 지능 업그레이드 AI를 훨씬 더 지능적으로 만들기 위해, 기존의 규칙 기반 시스템을 점수 기반 평가 시스템으로 강화해줘. AI는 돌을 놓기 전에 모든 빈칸의 가치를 계산해서, 가장 높은 점수를 얻는 곳에 돌을 놓아야 해. 각 칸의 점수를 계산하는 규칙은 다음과 같아. 점수 합산: 각 칸의 최종 점수는 '공격 점수'와 '수비 점수'를 합산하여 결정해 줘. 공격 점수: AI(백돌)가 특정 빈칸에 돌을 놓았을 때, 그 결과로 만들어지는 자신(백돌)의 연속된 돌 패턴(5개, 열린 4, 닫힌 4, 열린 3 등)에 따라 점수를 계산해 줘. 더 강력한 패턴일수록 점수가 높아. 수비 점수: 상대방(흑돌)이 특정 빈칸에 돌을 놓는다고 가정했을 때, 그 결과로 만들어지는 상대방의 패턴을 분석해서 점수를 계산해 줘. 상대의 강력한 공격을 막는 자리일수록 높은 수비 점수를 부여해 줘. 점수 우선순위: 패턴별 점수는 다음의 우선순위를 따르도록 해줘. 5개 연속 (필승) 열린 4 (다음 수에 반드시 이기는 공격) 닫힌 4 (상대가 막아야 하는 공격) 열린 3 (다음 수에 '열린 4'를 만드는 강력한 공격) 그 외 패턴들... 만약 위 계산을 통해 가장 높은 점수를 받은 칸이 여러 개라면, 그중에서 가장 먼저 찾은 곳에 돌을 놓게 해줘.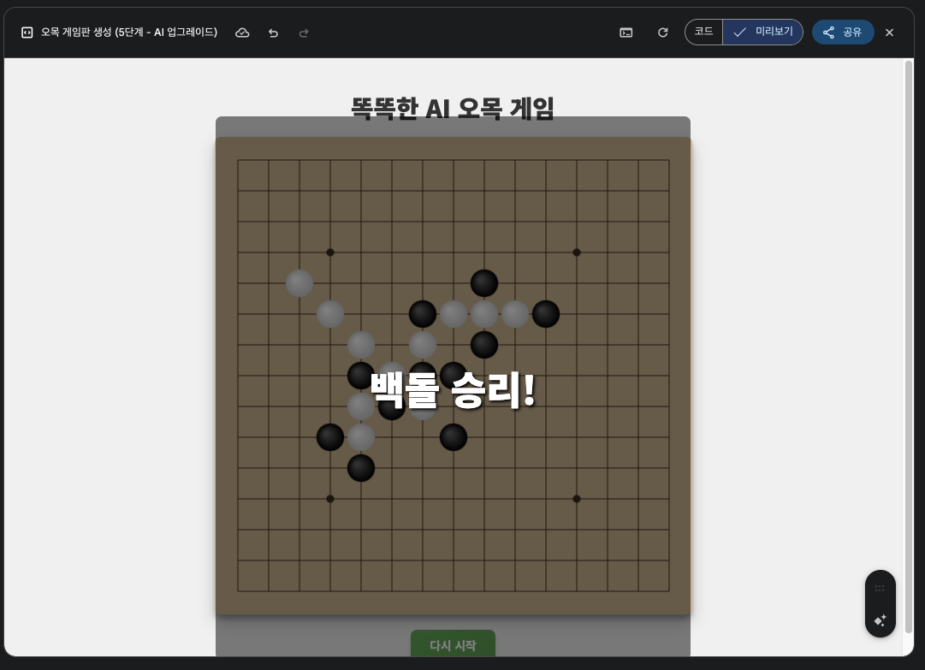
Whoa... I lost immediately.
Of course, I do win sometimes, but it's definitely gotten harder. .Like this..
Finally, we wrap up by adding a feature to restart immediately.
✅ Other: Convenience Features
Finally, add a 'Restart' button below the game board. When this button is clicked, all stones should disappear and the game board should be reset so the game can start from the beginning.
Although I plan to film the entire creation process later, watching the video below might make it easier to understand.
This concludes the first video of the AI prototype for creating a Go-moku game we made this time.
In the next episode, I plan to organize and post a guide on how to defeat this Go-moku AI step-by-step by upgrading its intelligence.
Will it really be possible with just Google Gemini Canvas?