Creality K1 프린터는 구조상 내부 필라멘트 공급관을 따로 빼서 사용하는 경우가 생기게 되는데, 이때 기본 장착되어져 있는 커버는 공간이 부족해서 추가 서포터를 제작해서 공간을 더 만들어주면 좋다.
그래서 Fusion 360 을 이용해서 내 나름대로 디자인한 커버를 제작해주었다.

내가 제작해놓은 STL 데이터는 Thingiverse 에서 다운 받아서 사용할 수 있도록 공유해두었다.
Creality K1 top cover support by soonsoon
This is a support printout to increase the upper space of Creality’s k1 printer.After printing, you can use it by attaching the cover of k1 and lifting it up.To use a neodymium magnet, it is designed to use a magnet with a diameter of 5mm x height of 5mm.inquirysoonsoon@soonsoons.com

제작 과정은 아래 영상을 참조하자.
나름 이런식으로 K1 의 플레이트에서 한번에 모든 부품을 출력할 수 있도록 디자인 해주었다.

내가 만든 순순 Draft 프로파일 기준으로 대략 4시간 정도면 출력이 가능하다. ( 빠른건가.. 느린건가.. )

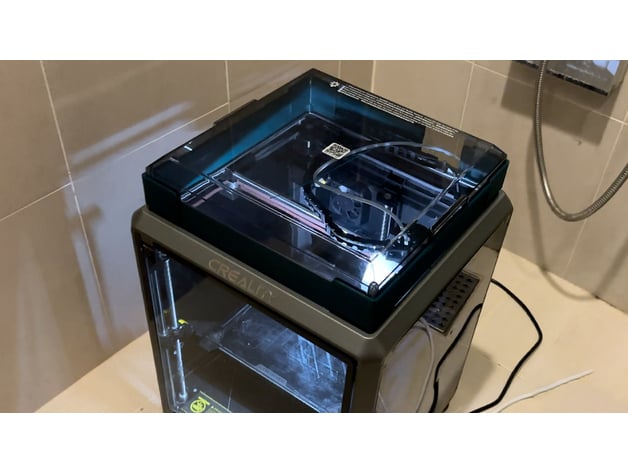
실제로 출력해서 장착하면 이런 느낌으로 사용가능

지금 잘 사용중인데, 쓰다보니 좀 개선 사항들이 보여서 업데이트를 해줄 예정이다. Ver 2.0 도 곧 공유해보도록 하겠다.
제품 구매 링크
K1 : https://s.click.aliexpress.com/e/_DdPFLP9
Hyper PLA : https://s.click.aliexpress.com/e/_Dmp7XZpCopper
Alloy Nozzle : https://s.click.aliexpress.com/e/_DnKOSaR